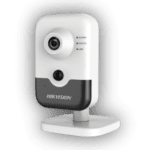
Wireless CCTV Camera Installation Guide

As technology continues to advance, the use of wireless CCTV cameras for surveillance and security purposes has become increasingly popular. These cameras can be installed in various locations, including homes, offices, and public places, to monitor activities and deter crime. However, installing wireless CCTV cameras can be a daunting task for many people. In this article, we will provide you with a step-by-step guide on how to install wireless CCTV cameras.
Step 1: Determine the Location
The first step in installing a wireless CCTV camera is to determine the location where the camera will be installed. Consider the purpose of the camera and the area you want to monitor. For example, if you want to monitor the front door of your house, you should install the camera near the front door.
Step 2: Install the Camera Mount
Once you have determined the location of the camera, you will need to install the camera mount. The mount is used to hold the camera in place. You can install the mount using screws or adhesive tape, depending on the type of mount and the surface it will be attached to.
Step 3: Connect the Camera to Power
Next, you will need to connect the camera to a power source. Most wireless CCTV cameras come with a power adapter that can be plugged into a power outlet. However, some cameras may be battery-powered, which eliminates the need for a power outlet.
Step 4: Connect the Camera to the Network
After connecting the camera to power, you will need to connect it to the network. This is done by connecting the camera to your home Wi-Fi network using the camera’s Wi-Fi settings. You will need to enter your Wi-Fi network name and password to connect the camera to your network.
Step 5: Configure the Camera
Once the camera is connected to the network, you will need to configure it to work with your surveillance system. This involves setting up the camera’s IP address, port number, and other settings that are necessary for the camera to communicate with your surveillance system.
Step 6: Test the Camera
After configuring the camera, you should test it to make sure it is working properly. You can do this by accessing the camera’s video feed using your surveillance system or mobile app. If the camera is not working properly, you may need to troubleshoot the issue or contact technical support for assistance.
Conclusion
Installing wireless CCTV cameras can be a challenging task, but with the right tools and knowledge, it can be done easily. By following the steps outlined in this guide, you can install a wireless CCTV camera in your home, office, or public place to enhance your security and surveillance system. Remember to always read the manufacturer’s instructions carefully and consult technical support if you encounter any issues.